
If you only have a few new students you need to add or move, you may instead want to update your classes manually. For instructions on updating your classes manually, click here.
Prepare your spreadsheet for upload
Make sure the names in your spreadsheet exactly match those on Sumdog to avoid creating duplicates. If you need to check, export your current student list using these instructions.
- The spreadsheet must include at least four columns:
- Column A: Student's first name
- Column B: Student's last name
- Column C: Student's grade/year level
- Column D: Name of the class the student should be placed in
Here is an example of a spreadsheet with the minimum amount of information required: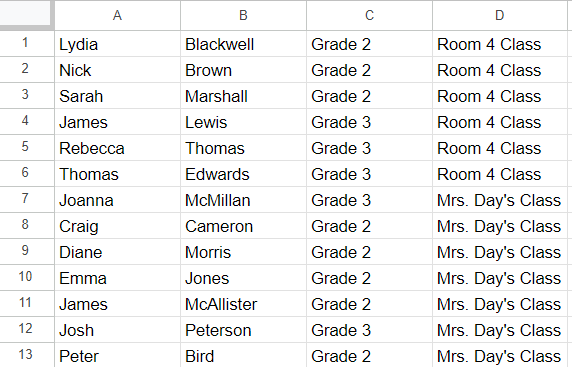
- In addition to the information above, you can include additional columns to modify your students' login details or to create custom usernames and passwords. Follow the same structure as for columns A-D, but add the optional columns:
- Column E: Student's username
- Column F: Student's password
Important tips:
- Don’t include headings. The first row must be student data.
- Student names on the spreadsheet must match exactly to the names on Sumdog.
- The maximum number of students per class is 50.
- If you have less than 50 students in a class but are still seeing a message that you've exceeded the maximum number of students, try moving the children into 'Pupils without a class' before uploading your spreadsheet.
How to create, rearrange and/or edit classes using your spreadsheet
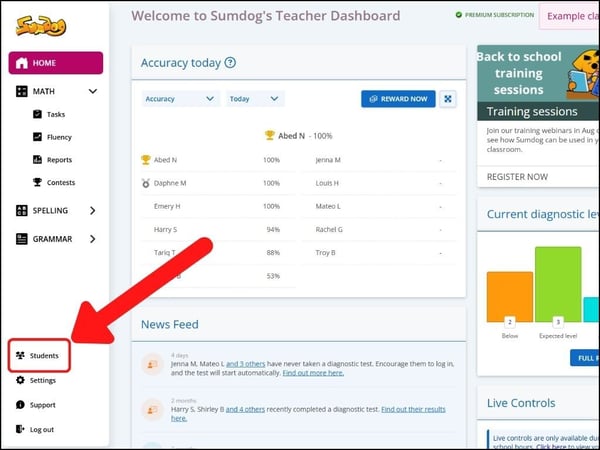
- Select "students" (or pupils) from the sidebar on the left of your dashboard
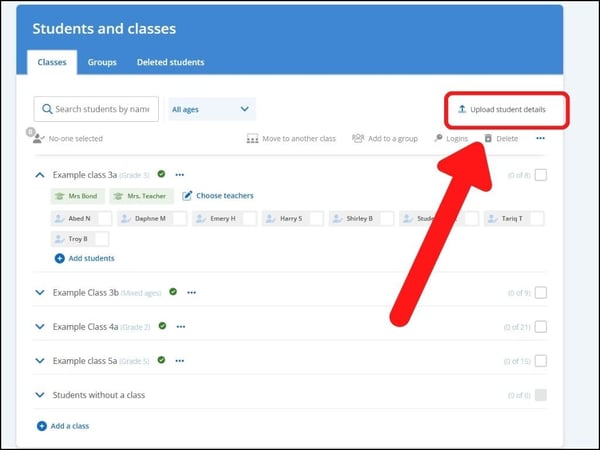
- Click "upload student details" near the top right of the page
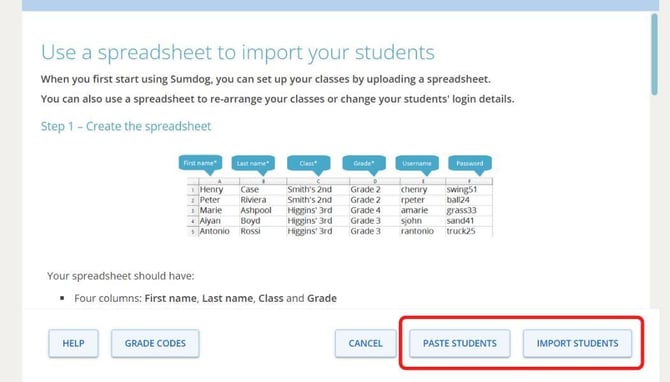
- You can either paste the data ("paste students") or upload a spreadsheet ("import students").
- If you choose “paste students”, copy and paste your spreadsheet data into the box.
- If you choose “import students”, upload your spreadsheet file from your computer.
- The next steps are the same for both options.
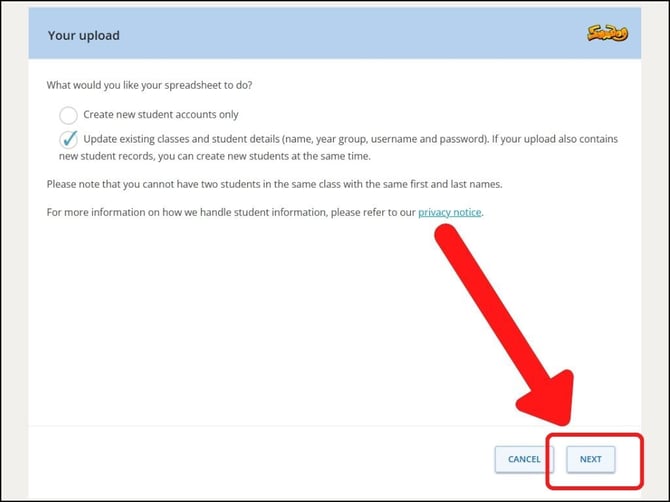
- After adding your spreadsheet, choose whether to create only new accounts, or to both create new accounts and update existing ones, then click “next”.
- If there are students who have never signed in and whose accounts are over six months old, you’ll be asked if you want to remove them. If unsure, select “No, do not delete any students” and click “next”.
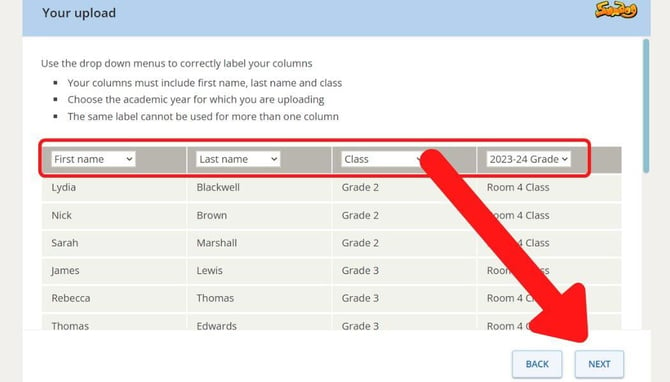
- Confirm the data type in each column using the dropdown menus. For example, if the column includes the class name, make sure the dropdown "class" is selected. Then click "next"
- You will now be shown a preview of the upload so you can see which accounts will be created and which accounts will be changed. If everything looks correct, click "save students"
- The final page will show you a summary of how many accounts have been created and how many existing students were moved to a new class. Click "done".
Tip: If your spreadsheet has a large number of students/classes, we recommend uploading only a few classes at a time