Groups can be used to organize students in your class/school roster into smaller sets. As with classes, you can view data and set work for groups, but groups have unlimited capacity. Students can also be in multiple groups at once.
How to create a group
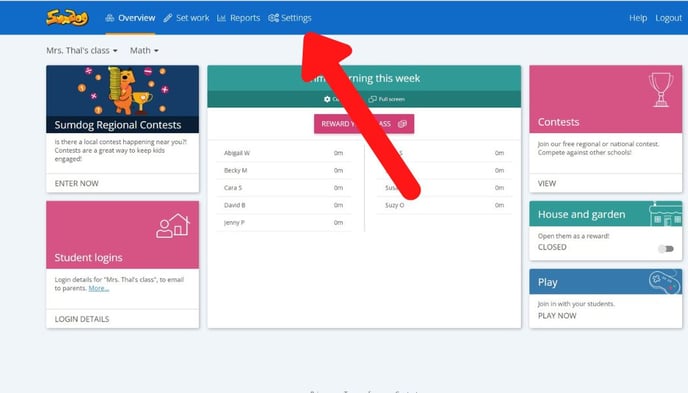
- Click 'settings' at the top of your Teacher Dashboard
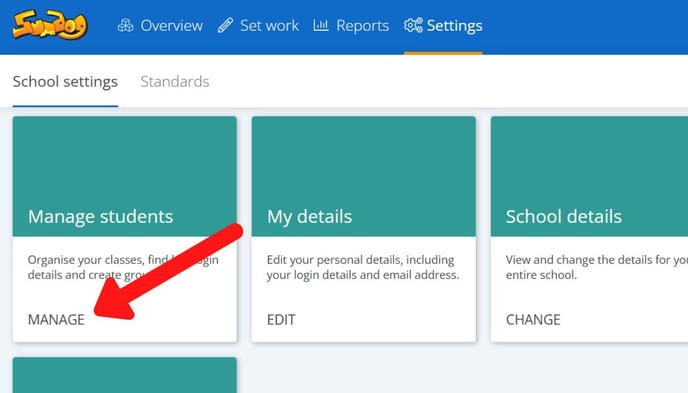
- Click 'manage' in the Manage Students box
- Click the blue arrow next to a class to see all the students in that class

- Select and deselect students by clicking the box next to a student's name. Once you've selected all the students you'd like to add to your group, click 'add to a group'

- If you'd like to add your students to an already existing group, select the group and click 'add pupils'

If you would like to create a new group, continue with the following steps. - Click 'add a new group'

- Type in the name of the group you'd like to create and click 'add group'

- Click 'add pupils'

- You have now created a group! You can view all the groups in your school by clicking on the 'Groups' tab.
